
Side Dishes
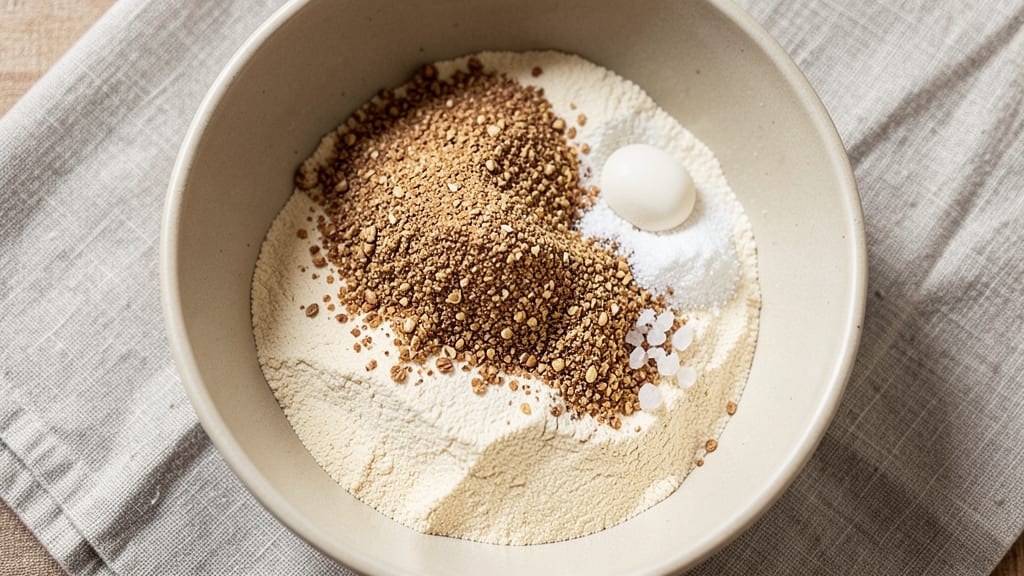
Transforming your bread recipe by adding whole wheat flour delivers nutritious loaves without sacrificing texture or taste. The key lies in understanding how whole wheat flour's higher protein and bran content demand adjustments—more hydration, longer kneading, and careful proofing to avoid dense results.
I’ve perfected this method over years of baking, ensuring your final loaf stays light, flavorful, and packed with nutrients.
Whole wheat flour absorbs moisture differently than white flour, so expect a stiffer dough that requires extra liquid—typically 10-15% more water or milk. Adding vital wheat gluten or a touch of oil can improve elasticity, while eggs enhance tenderness.
These tweaks balance the hearty flavor and chewy texture whole wheat naturally brings, without compromising the airy crumb you crave.
The proofing stage is where patience pays off—whole wheat dough needs more time to rise, often 50-100% longer than white flour dough. A warm environment and a touch of honey or sugar can encourage fermentation, while scoring the crust just before baking ensures an even rise and beautiful finish.
The result? A loaf with a crisp, golden crust and a tender crumb that’s noticeably lighter than traditional whole wheat bread.
Serve your nutrient-rich loaf warm with butter, or toast slices for a satisfying crunch. For extra flavor, consider adding seeds, nuts, or herbs to the dough. This method proves whole wheat bread doesn’t have to be heavy—just smarter. Let’s get started!
Ingredients for adding whole wheat flour to bread
Four cups of flour, a touch of gluten, and a few smart swaps. Whole wheat bread that’s light, flavorful, and packed with nutrients—no compromise.
| Ingredient | Amount | Notes |
|---|---|---|
| All-Purpose Flour 🌾 | 2 ½ cups | Standard white flour for base |
| Whole Wheat Flour 🌾 | 1 ½ cups | Unbleached for best flavor |
| Vital Wheat Gluten 🌾 | ¼ cup | Boosts elasticity and structure |
| Active Dry Yeast 🍞 | 2 ¼ tsp | Ensure it's fresh (test in warm water) |
| Granulated Sugar 🍚 | 1 tbsp | Feeds yeast for fermentation |
| Salt 🧂 | 1 ½ tsp | Kosher or sea salt preferred |
| Unsalted Butter 🧈 | ¼ cup | Softened but not melted |
| Large Eggs 🥚 | 1 whole | Room temperature for best mixing |
| Warm Water 💧 | 1 ¼ cups | 110°F for yeast activation |
| Honey 🍯 | 1 tbsp | Enhances browning and flavor |
| Olive Oil 🫒 | 1 tbsp | For dough softness and shine |
| Sesame Seeds 🌰 | 1 tbsp | Optional for topping (toasted) |
The whole wheat flour is the star, but it needs help. Bob’s Red Mill or King Arthur unbleached whole wheat flour are my go-tos—they’re milled finely enough to avoid that gritty texture. Vital wheat gluten is non-negotiable here; it mimics the gluten in white flour and gives your loaf that airy structure. Grab a small bag—it keeps for years in the pantry. For yeast, FreshPaks are worth the extra cost if you bake often, but regular active dry yeast works fine if you test it first (drop in warm water—it should foam in 5-10 minutes).
No vital wheat gluten? Add an extra 1/4 cup all-purpose flour and a splash of milk to compensate, but your loaf might be denser. Short on butter? Olive oil or applesauce keeps things tender, though butter gives that classic flavor. Honey can be swapped for maple syrup or extra sugar, but honey’s moisture and mild sweetness are ideal. The sesame seeds? Toast them in a dry pan for 2 minutes—they’ll smell amazing and add crunch. No sesame seeds? Poppy seeds or flaxseeds work too.
This dough is a beast—it needs time. Mix everything except the water, then let the dough rest for 10 minutes before adding the water. Knead by hand or mixer for about 8-10 minutes—whole wheat dough is tougher, so don’t rush. Let it rise in a warm spot (like your oven with the light on) for 1.5-2 hours, or until doubled. Shape your loaf, place it in a greased pan, and let it rise another 30-45 minutes. Bake at 375°F for 30-35 minutes until golden. Cool for at least 1 hour—patience here prevents a gummy crumb.
Why You'll Love This Recipe
- No-Fuss Mix-In: The vital wheat gluten and whole wheat blend make this dough ridiculously forgiving—no kneading marathon or second-guessing the texture. I’ve made this with just a bowl and a spoon, and the gluten keeps it light even when half the flour is whole wheat.
- Nutty Crunch Factor: That whole wheat flour adds a subtle earthiness, but the sugar and yeast keep it from tasting like a health-food lecture. Honestly, it’s the kind of bread where you’ll pause mid-slice to appreciate the little chewy bite—no dry, dense disappointment here.
- Weeknight Workhorse: Freeze half the dough for a lazy Tuesday morning, or bake a loaf on Sunday to toast through the week. Between us, this is the bread that survives my kids’ "I’m not hungry" phase—it’s sturdy enough for sandwiches but still soft enough to eat plain.
- Budget Boost: Using whole wheat cuts costs without sacrificing flavor, and the vital wheat gluten stretches the dough further. I’ll be real: my grocery bill dropped when I swapped out half the all-purpose flour, but my pantry didn’t. Win-win.
Step-by-step instructions for nutrient-rich whole wheat bread
Here's how to blend whole wheat flour without sacrificing lightness or texture.
Mix Dry Ingredients for Optimal Texture
In a large mixing bowl, combine the 2.5 cups all-purpose flour and 1.5 cups whole wheat flour. Add the 0.25 cup vital wheat gluten and whisk everything together thoroughly. This step is crucial because the whole wheat flour absorbs more water and lacks the gluten structure of all-purpose flour. The vital wheat gluten compensates by adding elasticity, which prevents a dense crumb.
Next, sprinkle the 2.25 teaspoons active dry yeast, 1 tablespoon granulated sugar, and 1.5 teaspoons salt over the flour mixture. The sugar feeds the yeast, while the salt enhances flavor and strengthens the gluten structure. Whisk these ingredients gently to distribute them evenly without activating the yeast prematurely.
Incorporate Wet Ingredients for Smooth Dough
In a separate bowl, whisk together the 1 whole large egg, 1.25 cups warm water (around 110°F), 1 tablespoon honey, and 1 tablespoon olive oil. The honey adds natural sweetness and helps with browning, while the olive oil contributes to a softer crumb. The warm water activates the yeast, so ensure it's not too hot—it should feel comfortable to touch.
Pour the wet ingredients into the dry mixture and stir with a wooden spoon or dough whisk until a shaggy dough forms. At this stage, the dough will look sticky and uneven, but don't worry. The gluten will develop as you knead, creating a smoother, more elastic texture. If the dough feels too dry, add 1 tablespoon warm water at a time until it comes together.
Knead the Dough to Develop Gluten
Turn the dough onto a lightly floured surface and knead for 8-10 minutes by hand, or use a stand mixer with a dough hook attachment for 5-6 minutes on medium speed. You're aiming for a smooth, elastic dough that springs back when poked. The whole wheat flour requires more kneading than all-purpose flour because it contains more bran, which can make the dough tough if not worked enough.
During kneading, the gluten strands align, creating a network that traps gas produced by the yeast. This is what gives bread its structure and lightness. If the dough feels too sticky, add 1 tablespoon all-purpose flour at a time, but avoid over-flouring, as this can make the bread dense.
Let the Dough Rise for Maximum Flavor
Lightly oil a large mixing bowl, place the dough inside, and cover it with a clean kitchen towel or plastic wrap. Let it rise in a warm place (like the top of the oven with the light on) for 1-1.5 hours, or until it has doubled in size. The dough should feel spongy and springy when pressed gently with a finger. This first rise allows the yeast to ferment, creating bubbles that give the bread its airy texture.
If your kitchen isn't warm enough, place the bowl near a heat source like a turned-off oven with the light on. The dough should rise steadily—if it doesn't bubble or rise within the first hour, your yeast may not be active. In that case, start over with fresh yeast.
Shape, Proof, and Bake for Perfect Results
Punch down the risen dough to release any large air bubbles, then shape it into a loaf by folding the edges toward the center and rolling it gently into a rectangle. Roll it up tightly from the long side to form a loaf, tucking the seam underneath. Place the loaf seam-side down in a greased 9x5-inch loaf pan and let it rise again for 30-45 minutes until it domes slightly above the pan.
Preheat your oven to 375°F. Brush the top of the loaf with a little water or melted butter, then sprinkle with 1 tablespoon sesame seeds for added flavor and texture. Bake for 30-35 minutes, until the bread is golden brown and sounds hollow when tapped on the bottom. The internal temperature should reach 190-200°F for a perfectly baked loaf.
Cool and Enjoy Your Nutrient-Rich Bread
Remove the bread from the pan and let it cool on a wire rack for at least 15 minutes before slicing. This cooling period allows the gluten to relax and the crumb to set, preventing a gummy texture. The bread should have a light, airy crumb with a slightly crisp crust, thanks to the honey and olive oil.
Slice the loaf and serve warm with butter, jam, or as part of a sandwich. The whole wheat flour adds a nutty flavor and extra fiber, while the vital wheat gluten ensures the bread stays tender and easy to digest. Store any leftovers in an airtight container for up to 4 days or freeze for longer storage.
Pro Tips For Making Adding Whole Wheat Flour To Bread
- Weigh Your Whole Wheat: Whole wheat flour is denser than all-purpose, so scooping it straight from the bag adds too much volume. Use a kitchen scale for accuracy—your bread’s texture depends on getting the ratio right, and guesswork leads to gummy loaves.
- Mix Gluten Last: Sprinkle the vital wheat gluten after combining wet and dry ingredients, then pulse it in lightly with a fork. Adding it early makes the dough tough; this way, it blends smoothly without overworking the gluten network.
- Let Yeast Bloom Warm: Dissolve the yeast in warm water (105–110°F) with sugar first, then wait 5–10 minutes until it foams before adding to the dough. Cold water kills it; impatiently mixing it in without proofing wastes your time and flattens the rise.
- Knead Less, Rest More: Whole wheat dough is sticky and breaks easily, so handle it just until the ingredients come together. Let it rest 20 minutes after mixing—this relaxes the gluten and makes shaping easier, even if it feels underworked.
Essential equipment for perfect results
Mixing Bowls
Start with a large mixing bowl (at least 5-quart capacity) for combining dry ingredients—this prevents spills when adding wet ingredients later. I prefer stainless steel bowls like OXO Good Grips because they’re durable and won’t absorb odors.
For kneading, a separate medium bowl (around 3-quart) is ideal for mixing wet ingredients to avoid cross-contamination. 🌾
Dough Scraper
A flexible dough scraper (like KitchenAid’s Silicone Dough Scraper) is essential for handling sticky whole wheat dough. It helps transfer dough without tearing and cleans up flour residue effortlessly. Avoid metal scrapers—they can damage mixing bowls over time. I keep mine near my counter for quick cleanup between batches.
Stand Mixer
While hand-kneading works, a stand mixer with a dough hook (like KitchenAid Artisan Series) saves time and effort. Whole wheat dough requires 5-6 minutes on medium speed to develop gluten properly.
If you don’t have one, a hand mixer with a dough hook attachment works in a pinch, though it’s more labor-intensive. 💪
Digital Thermometer
Accurate temperature control is key—especially for yeast activation. A digital instant-read thermometer (like Thermoworks ThermoPop) ensures your water is 110°F (not boiling). Whole wheat dough is forgiving, but yeast dies above 120°F, so precision matters.
I also use it to check dough temperature before shaping—ideal range is 75-80°F.
Loaf Pan
Use a 9x5-inch loaf pan (preferably nonstick or well-seasoned) to prevent sticking. I recommend Wilton’s Professional Loaf Pan—it’s heavy enough to conduct heat evenly. Grease it lightly with butter or olive oil and dust with flour before adding the dough.
For extra crust shine, brush with egg wash (1 egg + 1 tbsp water) before baking.
Wire Rack
Never cool bread on the pan—it traps steam and makes the crumb gummy. A wire cooling rack (like OXO Good Grips) allows air circulation for an even texture.
Place it directly on the counter or over a baking sheet to catch crumbs. I keep one in my oven for post-bake cooling to save space. ✨
Nutrition facts
Frequently asked questions
Why does my whole wheat dough feel so much stickier than regular bread dough?
Whole wheat flour contains more bran and protein than white flour, which absorbs moisture differently. The bran acts like tiny sponges, soaking up extra liquid and making the dough stickier. To manage this, add 1-2 tablespoons extra water gradually while mixing, and use a dough scraper instead of flouring your hands too much—over-flouring can make the bread dense.
Can I replace 100% of the all-purpose flour with whole wheat flour?
Not without adjustments! While you can use 75% whole wheat flour (like in this recipe), 100% substitution often results in dense, heavy bread. Whole wheat lacks the gluten structure of white flour, so add 1 tablespoon vital wheat gluten per cup of whole wheat flour or increase hydration by 15-20%. For best results, start with a 50/50 ratio and gradually increase whole wheat flour over time.
How do I fix a whole wheat dough that won’t rise properly?
If your dough isn’t rising, check these three things first: 1) Yeast freshness (test in warm water—it should foam in 5-10 minutes), 2) Water temperature (should be 110°F, not hot), and 3) Dough temperature (ideal is 75-80°F). If the issue persists, try adding 1 teaspoon extra sugar to feed the yeast or proofing in a warmer spot (like a turned-off oven with the light on). Whole wheat dough often needs 50-100% more time to rise than white flour dough.
What’s the best way to store whole wheat bread to keep it fresh?
Whole wheat bread stays fresh longer when stored in an airtight container at room temperature for 3-4 days. For extra freshness, wrap individual slices in parchment paper or freeze the loaf in slices (up to 3 months). To revive stale bread, warm slices in a 350°F oven for 5-10 minutes with a damp towel—this restores moisture without drying it out further.
Can I add other whole grains like oats or cornmeal to this recipe?
Yes! For added texture, replace up to 1 cup of the whole wheat flour with coarsely ground oats or cornmeal. Just reduce the liquid by 1 tablespoon per cup of grain (grains absorb moisture). Toast the grains first for 2 minutes in a dry pan to enhance flavor. Avoid exceeding 25% grain substitution—too much can disrupt the bread’s structure and make it crumbly.